Airsoft Mines? Pt 2
Hello again! Continuing from my last post (Airsoft Mines? Pt 1), I'll discuss my current project: The motion-activated mine.
I realized that this was turning into one of those “recipe blob post” where the author talks about their life story before you get the recipe on how to make toast.. so if you don’t want the backstory about how this project started, scroll about halfway down the page.
This idea started when my young daughter and I got gellyball guns for Christmas. Gellyball guns are similar to airsoft guns but shoot soft, water-absorbing gel balls. These gel balls make them safer and more enjoyable for younger ages as they don’t sting as much as paintball or airsoft. She had lots of fun shooting at aluminum cans and other targets. We even set up little "missions" against these targets, pretending we were on secret spy adventures. However, she doesn’t like shooting the Gellyballs at each other.
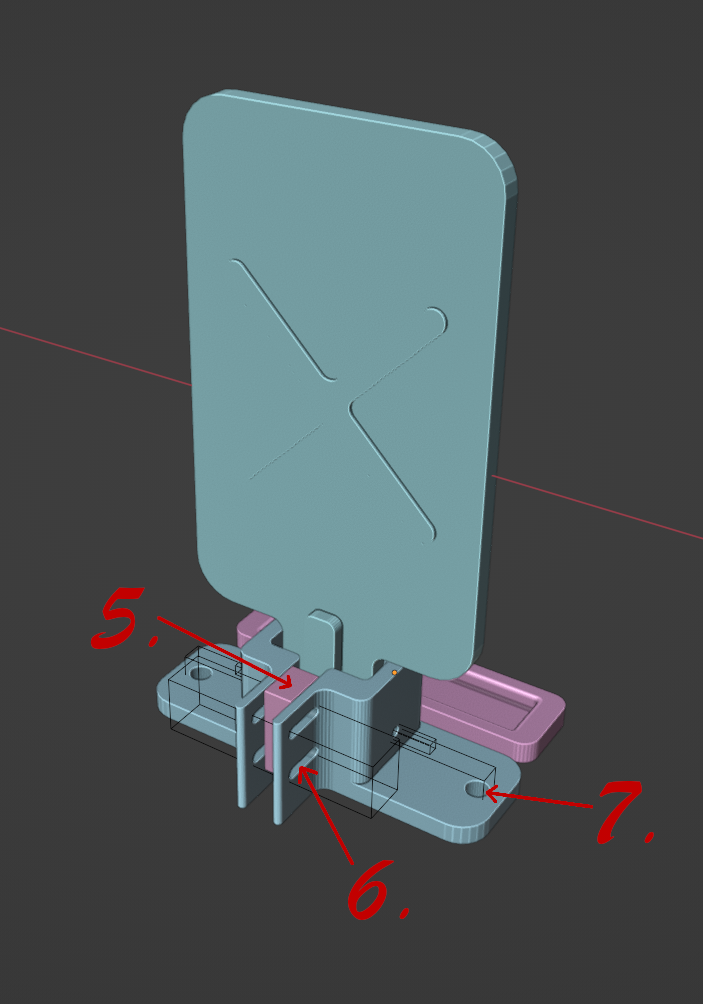
I wanted a way to make the missions we set up more challenging without the need for us to shoot at each other. The first thing I made was a target that had a microswitch behind a paddle. A microswitch is a small, sensitive switch that is actuated by very little physical force, which makes it perfect for our target setup. The paddle was the same dimensions as an aluminum can and had a series of lights at the base. There is also a pre-tensioner screw so I could “pre-load” the micro-switch to adjust how much force was necessary to depress the switch.
At the beginning, the lights would be red, and after the target was hit, the lights would turn green, showing the target was out. But, after a random amount of time between 30-60 seconds, the lights would go back to RED! This random reactivation added an element of surprise, making the missions more dynamic and exciting.
Paddle
Mounting Block
LED Strip Tray
Pre-Tentioner Screw Hole
Micro-Switch
Micro-Switch Adjustment
Mounting Hole
After this, I wanted to make it a little more challenging for us, and I wanted the target to shoot back! I had a few ideas on how to do this, like using compressed air through a vortex block, modifying a gellyball gun to shoot back at us, or using a one-time “spring-slinger” that would use a coiled-up spring to throw Gellyballs at us once. I didn't really like any of these ideas because:
They were single-direction, meaning we would have to approach from a certain spot for there to be a challenge.
They were single-use, requiring them to be reset after each use.
These ideas might be good for a different application but just wouldn’t fill the need I had.
Later, I remembered an episode of Mythbusters where Adam and Jamie built a steam-powered gun. In the episode, they created a device with a rotating tube that was blocked during 3/4 of the rotation by a steel drum. Steel balls would be dropped into the rotating tube and run along the inside of the steel drum until they reached the open portion where they would be slung out at high velocity. You can see a video here. so I opened Blender, started messing around and the idea slowly came together.
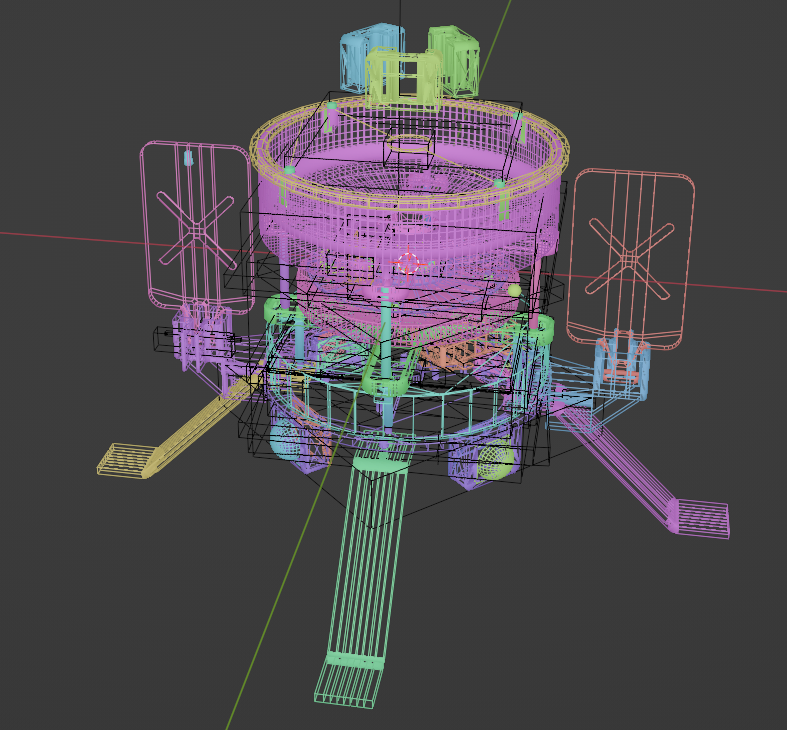
I don’t remember all the design choices I made because I wasn’t planning on sharing it. So I'll just break down the major components as it stands currently. Of course, some of the parts will change because this is a prototype, and as I find issues or think of better ways to do something, I’m going to change it.
Let’s work our way from top to bottom
The Hopper Cover and Fill Port:
Pretty self-explanatory, this holds the bbs or gelly-balls in and keeps them from falling out.
The Hopper:
This is the reservoir for the mine, and hold between 5000-6000 bbs. The hopper also houses a servo for controlling the valve. Originally this part was going to be a 16oz water bottle that was held in place by some elastic bands but that quickly changed into what it is now.
Hopper Mount and Valve:
A pretty simple part used to mount the hopper and to control the flow of bbs into the Flywheel (4).
Flywheel:
This part is where the magic happens. it spins up and ejects the bbs out to 60ft (18 meters). However this is still an estimation as I haven’t measured it yet.
Motor Mount:
Houses and hold the motor.
Electronics Enclosure:
Keeps the electronics safe from stray bbs and debris. currently, I’m using an Arduino but will most likely switch to a dedicated circuit board when the prototype is finished.
PIR Modules:
there are 4 of them around the base of the mine. they have a 110-degree field of view so there is a small amount of overlap meaning you cant sneak up on this mine! I’m messing around with the idea of moving them to the top so they are not blocked by taller grass. If i do move them i’ll probably reduce the number to three, so there would be a small gap in their viewing angle but good luck walking that tightrope.
Legs:
A recent addition I made to simply get the PIR modules off the ground and protect them from any dew or moisture there might be.
So that's mine for now, but I’m currently working on some new improvements and features. I’ll be posting minor and major updates to the mine here and major updates to Reddit. I don’t want to clog up r/airsoft with the small details.
If you want to be notified when I make changes to the mine, PLEASE sign up for our mailing list at the bottom of this page. (I also give out discount code there too!)
If there is something you think I should add/remove/change, let me know in the comment section below!
In the next post i’ll go into the features and how it works


